Stay Warm and Upright: Top Snow Boots for Deep Snow, Ice
Stay Warm and Upright: Top Snow Boots for Deep Snow, Ice
Choosing the best snow boots for deep snow and ice comes down to three moves: match insulation to your activity (200g for moving fast, 400g+ for subzero or stop‑and‑go), pick waterproof winter boots with sealed builds and gusseted tongues, and plan for traction devices on glare ice. As a rule of thumb, 200g insulation keeps pace with high-exertion hiking, while 400g+ targets subzero or low-activity use—a framework we use at Hiking Manual and that’s echoed in REI’s winter boot guide. “Insulation rating (e.g., 200g, 400g) is a weight-per-square-meter measure of synthetic fill that correlates with warmth: 200g suits active movement; 400g+ targets subzero or low-activity use, but too much insulation can cause sweat-related chills.” And here’s the safety disclaimer up front: no outsole truly guarantees traction on ice—add microspikes when surfaces glaze, a finding repeated in Switchback Travel testing.
This guide maps insulated snow boots to real scenarios—from powdery trailheads to slushy city blocks—so your winter hiking boots keep you warm and upright with reliable traction on ice when paired with spikes, the way we plan outings at Hiking Manual.
Hiking Manual
Our approach is pragmatic, safety-led, and scenario-based. We tie gear to real winter decisions—temperature swings, surface type, and bailout options—so your choices fit both your budget and risk tolerance. We prioritize footing and warmth decisions you can repeat in the field. The same phased thinking we use in our beginner-friendly ultramarathon training plan (12–18 weeks with 12 targeted workouts) shows up in our boot picks: you’ll see clear tradeoffs, simple checklists, and where to add accessories like gaiters or microspikes. We fold in lessons from loop-hike planning pitfalls and budget tools, seasonal access nuances (like Cairngorms winter closures), mobility tips for wrist-friendly stability work, and our durable, value-first gear roundups.
Quick pre-buy checklist:
- Temperature band and activity level (moving vs. stop-start)
- Snow depth (powder vs. plowed) and slush exposure
- Shaft height and gaiter compatibility
- Traction devices for ice and packed paths
- Fit with your real sock system
FUBUKI Niseko 3.0
A lightweight EVA-shell boot that shines in very wet snow and deep slush. The outer is injection-molded EVA for near-seamless water resistance, paired with a half-wool/half-polyester liner and a two-layer removable insole that lets you fine-tune comfort and drying. The liner is commonly tested to about -5°F for casual to moderate activity; size choice and socks will shift that comfort window. You’ll find both ankle and knee-high cuts: size up slightly for the taller versions to preserve sock space and calf comfort. Think driveway-to-trail transitions, snowblowing, or dog walks through slushy berms. On true ice, plan to add microspikes.
The North Face Chilkat V 400
Built for reliable subzero warmth, this 400g-insulated boot is ideal for low-output or stop-start days when you’re more likely to chill from sweat if you overdress and then stand around. It thrives during snow shoveling sessions, belays, wildlife photography, or plowed-trail walks in severe cold. Pair with microspikes on ice and test the fit with thicker socks—ensure you’re not pinching volume at the instep, which can restrict circulation.
Columbia Bugaboot
A mainstream, subzero-ready choice often offered with 400g insulation for deep-cold use. It’s a strong match for colder resort towns, snowshoeing trailheads, or urban commutes with long waits at crossings—classic stop-and-go where 400g shines. Add mid-height gaiters when sidewalks drift and parking-lot berms collapse into your path so snow doesn’t creep over the collar.
Merrell Thermo Chill 2 Mid
A budget-friendly, active-hiking pick that balances warmth and breathability. You get 200g of proprietary synthetic insulation, a soft fleece lining, and a PFAS-free waterproof membrane that blocks snowmelt and light rain while letting sweat vapor escape. Use it for steady movement on forest roads or rolling singletrack in roughly 15–35°F conditions. Avoid long stationary periods in deep cold. The mid-height collar preserves ankle mobility; for glare ice, bring microspikes, and consider a light gaiter for fresh powder.
Sorel Caribou
A classic for wet, slushy winters, thanks to waterproof leather, a wraparound rubber lower, a gusseted tongue, and a 9mm removable felt liner that dries quickly between storms. Wirecutter’s winter boot tests highlight this drying advantage and note that ankle support feels less rigid than many hiking-first designs—tight, even lacing and gaiters help stabilize and seal out snow. Best for low-to-moderate activity in soggy conditions; add traction aids on icy patches.
Baffin Snow Monster
Purpose-built for extreme-cold, long-duration protection, with an often-quoted rating down to -94°F for severe exposure. It’s overkill for typical hikes but exactly right for arctic blasts, ice fishing, or outdoor work when warmth trumps agility. Expect real bulk and weight; manage moisture carefully with socks you can swap to prevent sweat buildup that chills later.
Baffin Chloe
A women’s-specific, extreme-cold option recognized for standout warmth and breathability in comparative testing by OutdoorGearLab. It’s a reliable pick for subzero errands, spectating winter events, or low-output time outside. As always, pair with traction devices when sidewalks glaze.
Oboz Bridger
A tall, trail-focused boot for snowy hikes, with 400g-insulated options in the Bridger 10" (men) and 9" (women). The outsole does well on snow and mixed winter trails, though lower cuts in the line can admit snow in drifts. Removable components help overnight drying after wet days; still plan space and time to reset between outings. Excellent gaiter compatibility—and don’t hesitate to add microspikes on mixed frozen terrain.
Salomon Toundra Pro
A leather-free, highly waterproof build with technical traction that pairs well with snowshoe bindings and deep-snow travel. It’s designed for repeated submersion in drifts and binding pressure, aligning with the 400g-class warmth expectations that snowshoe-oriented boots often target, as outlined in Happiest Outdoors’ snowshoeing boot guide. When choosing bindings for deep-cold days, ensure they don’t compress the toebox; pressure points reduce circulation and warmth.
How to choose for deep snow and ice
Balance warmth, waterproofing, traction, shaft height, and fit—then confirm when you’ll add microspikes. Use this quick matrix to match specs to scenarios.
| Use-case | Insulation | Shaft height | Waterproofing features | Notes |
|---|---|---|---|---|
| Active hiking (15–35°F) | 200g | Mid (6–7in) | Breathable membrane | Prioritize fit and breathability; add microspikes on ice. |
| Static subzero (≤10°F) | 400g+ | Tall (9–10in) | Removable liner for drying | Prevent sweat chill; roomier fit for socks. |
| Slush/wet focus | 200–400g (per temp) | Mid–Tall | Rubber lower, gusseted tongue | Great for post-storm sogginess and thaw cycles. |
| Powder/drifts | 200–400g (per temp) | Tall (9–10in) | Gaiter hooks/D-rings | Pair with gaiters to seal out deep snow. |
“Gusseted tongue is a tongue sewn to the boot’s sides to keep water, slush, and snow from entering the foot cavity.” This feature supercharges slush performance by blocking top-down seepage.
Insulation and activity level
200g insulation usually suffices for hiking and high-exertion movement; 400g is very warm for subzero or stop-start days, and too much insulation can drive sweat that chills you later (the core framework reflected in REI’s guidance linked above). Examples:
- Moving pace on rolling trails: Merrell Thermo Chill 2 Mid (200g).
- Standing chores or arctic mornings: 400g class like Chilkat, Bridger, or Bugaboot.
Waterproofing and moisture management
For slush, look for wraparound rubber lowers, waterproof leather, and gusseted tongues, as exemplified by the Sorel Caribou highlighted by Wirecutter. Breathable, PFAS-free membranes can keep melt and light rain out while allowing sweat vapor to escape (Merrell’s approach). Favor removable liners and insoles to accelerate drying on multi-day trips (Caribou’s felt liner; FUBUKI’s modular insole system).
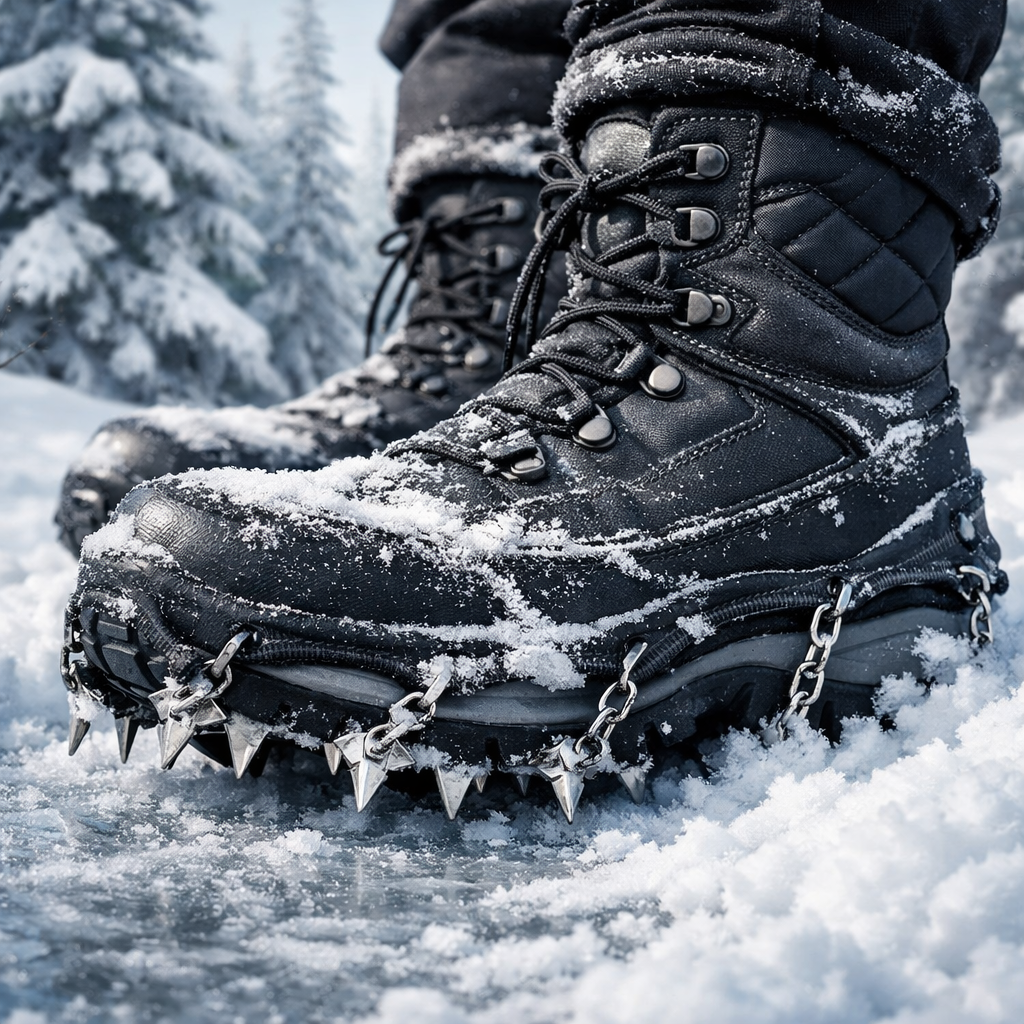
Traction and when to add microspikes
No boot guarantees perfect grip on glare ice. Add microspikes or winter traction devices when surfaces glaze or refreeze—a finding echoed throughout Switchback Travel’s testing. This is also our baseline at Hiking Manual: plan traction for ice first, then layer in boot features. Look for:
- Wide bases that resist ankle roll in sidehills
- Aggressive, directional lugs that bite into packed snow
When to deploy spikes:
- Freezing rain or overnight refreeze after melt
- Packed sledding hills and polished trailheads
- Glazed sidewalks, parking lots, and bridge decks
- Icy creek approaches and crossings
Shaft height, gaiters, and fit
Deep powder rewards taller shafts or gaiter-compatible designs; taller collars may require sizing up for calf room, as we noted with higher-cut models like FUBUKI. Seek D-rings or front gaiter hooks for a better drift seal. Fit rules: locked-in heel, wiggle room at toes, no midfoot “swim.” Use lacing above the ankle to add sidehill security without strangling circulation.
Sizing and sock systems
Try boots late in the day with your real winter socks (liner + midweight wool). Taller models often benefit from a half-size up; heat-moldable or removable liners improve comfort and drying. Three-step sock plan:
- Wicking liner sock to move moisture
- Midweight wool sock for insulation
- Spare pair to swap mid-hike if feet run hot
Safety and maintenance tips for winter travel
- Deploy traction early: if you see sheen or refreeze signs, put spikes on before you step onto the slope—our default at Hiking Manual.
- Keep feet dry to stay warm: manage socks and vent heat to avoid sweat chill.
- Plan conservative turnarounds: daylight, weather shifts, and surface change can compound quickly in winter.
How-tos:
- Microspikes use: fit them on level ground, confirm even tension, shorten your stride, and keep weight centered.
- Liner drying: remove liners/insoles, stuff with dry newspaper or use moving air; modular felt and insole systems dry fastest.
- Break-in: take short cold walks in your intended socks, fine-tune lacing zones for heel lock, and recheck tightness after 15–20 minutes as materials warm.
Prevent slips on glare ice
Add microspikes on polished or glazed surfaces regardless of outsole tech. Mini flow:
- Scan for surface sheen and refreeze cues → Fit spikes before the slope → Shorten stride and keep hips stacked over your feet. Remember: wide bases and aggressive lugs help—but they don’t replace spikes on true ice.
Drying liners and managing sweat
Remove liners/insoles nightly and dry with warm, moving air; felt liners (Caribou) and modular insoles (FUBUKI) speed the reset. If your feet run hot, do a mid-hike sock swap. Breathable membranes (e.g., Merrell’s PFAS-free) help vent vapor before it condenses.
Break-in, comfort, and blister avoidance
Break boots in gradually in cold conditions with your real sock system. Use zoned lacing for heel lock; consider supportive insoles if arch fatigue appears. Avoid over-tight lacing that restricts blood flow—recheck tension as the boot warms and settles.
Planning smarter winter outings
Match your boot to route grade, expected surfaces, and bailout options, then read the freeze–thaw forecast. For more traction-forward picks and context, see our winter boots roundup at Hiking Manual.
Conservative loop-hike planning and bailouts
- Evaluate midpoint commitment: can you reverse safely if conditions glaze?
- Map bailouts every 2–3 miles and note plowed egress points.
- Set a “turn time” and stick to it when daylight and temps drop.
- Carry budget tools: offline maps, paper backup, and a headlamp—avoid committing to shaded benches that ice up late day.
Seasonal access checks and closures in mountain parks
Check official advisories for seasonal gates, avalanche controls, and road status. Use a Cairngorms-style routine: confirm road openings, read wind/temperature trends, check avalanche forecasts where relevant, and keep a daylight margin.
Training mobility and durability for winter footing
Short, wrist-friendly pose progressions plus ankle/hip mobility reduce bracing strain from minor slips. Layer in low-impact strength for foot and arch durability. Build consistency with a phased plan—the same approach behind our 12–18 week beginner ultramarathon schedule with 12 targeted workouts.
Frequently asked questions
Do I need 200 g or 400 g insulation for winter hikes?
Choose 200g for active hiking where you’ll generate heat, and 400g for subzero or stop-and-go days when you risk cooling off. That simple rule guides Hiking Manual’s picks, and too much insulation can cause sweating that chills you later.
Are any boots truly secure on ice without traction devices?
No boot guarantees reliable grip on glare ice. Carry and use microspikes or similar traction devices whenever surfaces are glazed, refrozen, or polished—our standard practice at Hiking Manual.
How tall should my winter boot shaft be for deep powder?
Pick a taller shaft (9–10in) or use gaiters to keep powder out. At Hiking Manual, we pair higher collars and gusseted tongues with gaiters when breaking trail.
Should I size up for thick socks or taller shafts?
Often yes—especially in taller shafts. At Hiking Manual we typically go a half-size up to preserve toe room, circulation, and easy on/off with real winter socks.
How do I keep liners and insoles dry between back-to-back cold days?
Remove liners and insoles, air them in warm moving air, and stuff boots with dry newspaper. Hiking Manual favors removable felt liners and modular insoles because they dry faster, reducing next-day chill and blisters.