Standing vs Floor Hip Openers: Which Yoga Poses Help Tight Hips?
Standing vs Floor Hip Openers: Which Yoga Poses Help Tight Hips?
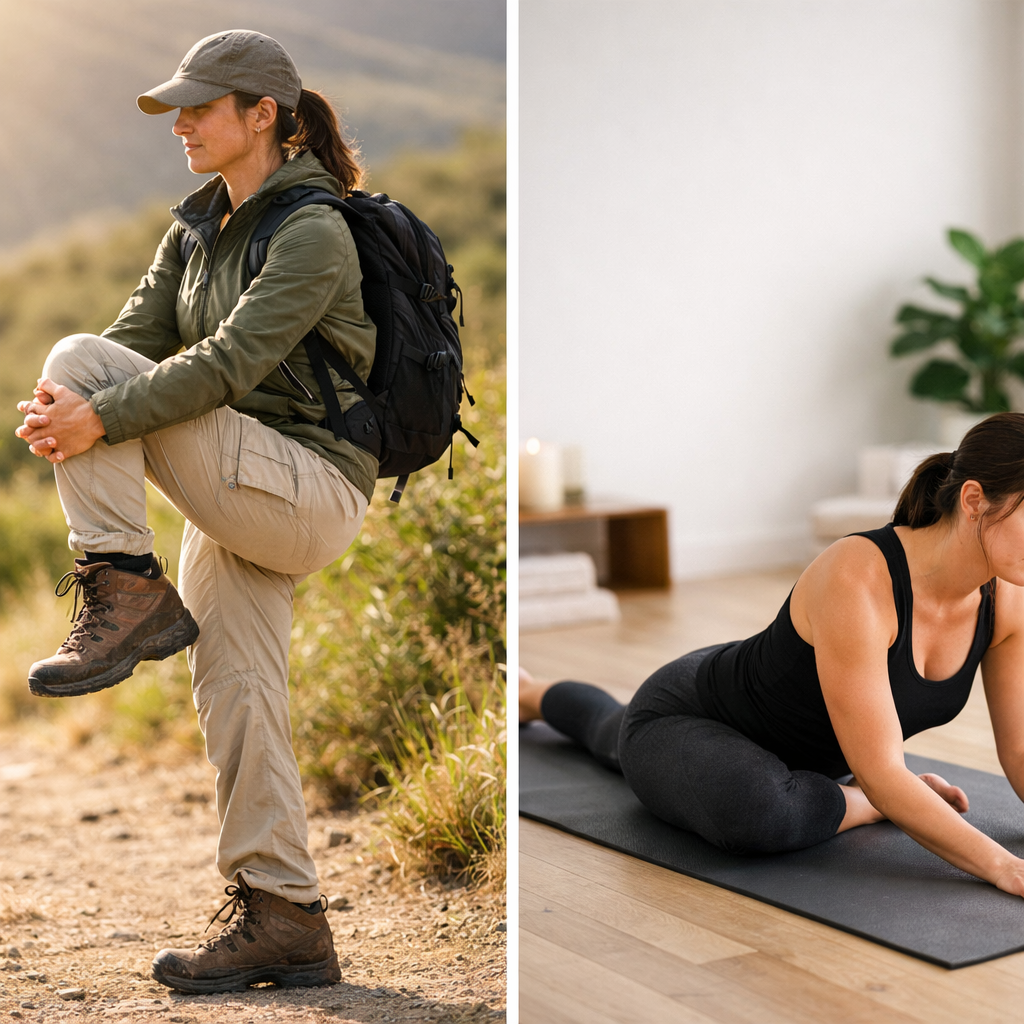
Tight hips can make every uphill step, creek hop, and rocky descent feel harder. For hikers, the best yoga poses for tight hips are the ones you’ll actually do—consistently and safely. Standing hip openers shine as mobility warm-ups and balance builders before a hike. Floor hip openers feel deeper and work best after you’re warm or post-hike for recovery. Neither is “better” across the board. Use standing work to groove control and alignment, then add floor poses for longer, supported holds. Below you’ll find practical picks, step-by-step cues, and a simple weekly plan tailored to hikers, plus when to choose standing vs floor based on your day, terrain, and time. At Hiking Manual, we use this pre-hike vs post-hike split to keep hips trail-ready without overdoing it.
Why tight hips matter for hikers
Tight hips describe limited motion from stiffness in muscles and joint structures around the ball-and-socket hip, often from prolonged sitting and repetitive patterns. It can restrict flexion, extension, and rotation, altering walking mechanics and load distribution. Hip openers can boost circulation, flexibility, and range of motion; unchecked tightness is associated with reduced mobility and back discomfort, especially under load, as summarized in this complete guide to hip openers from YogaBasics.
On trail, freer hips help you:
- Lengthen stride on climbs and control step-downs on descents.
- Maintain balance on sidehills and uneven rock.
- Carry a pack without over-arching your low back.
- Navigate stream crossings and boulder scrambles with better external rotation and adduction control.
Hip anatomy basics that drive mobility and tightness
“The hip is a ball-and-socket joint formed by the femur and the acetabulum; the pelvis comprises the ilium, sacrum, and pubic arch forming the acetabulum.” —YogaBasics
Key motions you’ll see referenced:
- Flexion/extension
- Abduction/adduction
- Internal/external rotation
Modern sitting shortens the hip flexors and reduces time spent squatting, which contributes to stiffness and poorer athletic movement quality. Multi-planar mobility drills counter these habits and carry over to real movement demands, as highlighted by Equinox’s overview of multi-planar hip openers.
How we compare standing vs floor hip openers
Categories:
- Standing hip openers: weight-bearing, balance-forward work such as step-back lunges and ladder/bar adductor stretches. These build active control and are ideal as warm-ups, with brief holds for some drills, per this standing hip opener standard from Outdoor-Fit.
- Floor hip openers: ground-supported positions like pigeon, lizard, and supine baddha konasana. Many hikers feel a deeper stretch because you can relax into the floor after warming up.
Quick comparison
| Feature | Standing hip openers | Floor hip openers |
|---|---|---|
| Primary benefit | Active control, balance, proprioception | Deeper, localized stretch and relaxation |
| Best timing | Pre-hike warm-up, movement prep | Post-warm-up or post-hike recovery |
| Typical hold/reps | Dynamic 8–20 reps; some isometrics ~15s | Supported holds 60–120s |
| Depth vs safety | Shallower but highly controllable | Deeper—requires careful angle selection |
| Props | Trekking poles, wall, tree | Blocks, straps, blankets, sitting pad |
Consistency matters more than intensity: 3–4 sessions per week typically drives progress, as emphasized by Evolv Physical Therapy’s mobility guidance.
Standing hip openers overview
Standing work emphasizes active control, balance, and multi-planar mobility—ideal for hikers who need strength at end range and stability on uneven ground, a core focus in Hiking Manual warm-ups. These drills wake up hip flexors, glutes, and adductors that get dulled by sitting, and they translate cleanly to gait and step-ups. Equinox’s multi-planar hip opener framework underscores how rotational and side-to-side actions prepare the hips for real terrain.
Anecdotally, a month of daily hip openers improved balance and made everyday tasks like getting up from a chair easier for one practitioner, as reported by Fit&Well.
Floor hip openers overview
Most classic hip openers are practiced low to the floor, where support encourages slower breathing and greater tissue relaxation, a pattern summarized by YogaBasics. Floor poses like pigeon, butterfly (baddha konasana), and happy baby let you explore external rotation, adduction, and flexion with less balance demand—perfect after warm-ups or post-hike. These are also post-hike mainstays in Hiking Manual routines. Some practitioners also describe a calming effect or emotional release during longer holds, a theme discussed by The Yoga Collective.
Depth vs control
Floor poses allow longer, deeper holds because the ground supports you; standing variations prioritize balance, joint position sense, and strength through range. As physio insights remind us, eccentric lengthening is not the same as relaxation—tissues can lengthen under tension, so avoid forcing end range, per Dr. Garrett Neill’s discussion on Shut Up & Yoga.
Takeaway: Build control first with standing mobility, then add floor work for depth—especially once your joints are warm.
Functional carryover for hiking and daily movement
- Outcomes: A month of daily hip openers improved balance, calmed sleep, and made sit-to-stand easier in a real-world trial, according to Fit&Well.
- Crossover: Standing drills sharpen gait mechanics, balance on sidehills, and load acceptance on descents. Floor holds ease local stiffness post-hike, helping you recover stride length.
Trail task map:
- Extension + internal rotation: powering push-offs on climbs; coordinated trekking pole plants.
- Abduction/adduction: edging on sidehills and scree traverses.
- External rotation: big step-overs, rock hopping, creek crossings.
Programming and dosage recommendations
- Frequency: 3–4 sessions per week; consistency beats intensity for lasting change, a principle echoed by Evolv Physical Therapy.
- Warm-up vs cool-down:
- Pre-hike or pre-strength: dynamic standing mobility 8–20 reps per pattern; select standing adductor stretches for 1–2 x ~15s per side.
- Post-hike or post-strength: floor holds 60–90s (up to 120s as tolerated) for targeted release.
- Sequencing: Do your hike or lift first; then layer longer floor holds. Include strength-integrated moves (e.g., goblet squat holds) to “own” new range with control.
This is the same, simple sequence we use in Hiking Manual hike-day templates.
Safety, modifications and red flags
Hip preservation > hip “opening.” The term can invite end-range pushing that outpaces the capacity of cartilage and bone. Respect your structure and avoid chasing extreme angles, a warning underscored by pelvic health clinicians in Hip Openers in Yoga: Stop the Madness and the critique that not every “hip-opening” pose is what it seems in New Warrior—It’s Not a Hip Opening Pose.
Rules of thumb:
- No sharp pain, pinching, or joint clicking. If present, change the angle, reduce depth, or stop.
- Favor neutral pelvis options; use blocks, straps, or blankets for support.
- Remember: Hip morphology varies widely; some positions (deep adduction + internal rotation) may impinge for certain hips. Modify without hesitation.
Best standing hip openers for hikers
- Step-back lunge with reach (dynamic): From standing, step one foot back, keep a tall torso, and reach the same-side arm overhead; focus on hip extension and glute engagement. Add a slight torso rotation toward the front knee for balance.
- Hip opener skips or knee lifts to the side (dynamic): March or skip, lifting the knee and gently opening it out to the side; 2 x 8–12 reps per side to groove abduction/adduction control. Keep ribs down; move the hip, not the low back.
- Standing adductor stretch at ladder/bar (isometric): Place one foot wide on a low step or support, bend the opposite knee, and lean into the inner-thigh stretch for ~15 seconds per side, 1–2 reps. Keep hips level; avoid collapsing the arch.
- Standing figure-4 glute stretch (isometric): Cross ankle over opposite knee and sit back slightly while holding a wall/tree. Keep the spine long; adjust the angle to avoid pinching.
- Multi-planar hip circles (dynamic control): Hold a trekking pole or wall; draw slow, controlled circles with the free leg, exploring internal/external rotation without pelvis sway. 2 x 6–8 circles each direction.
Trail-friendly regressions: Use trekking poles, a tree, or a park bench for support. Keep ranges modest on stiff days.
Dynamic warm-ups and balance builders
- Step-back lunge with reach: Tall torso, back heel long; target hip flexor opening, balance, and extension control. 2 x 8–10 per side.
- Hip opener skips/knee lifts to the side: Light, rhythmic; 2 x 8–12 per side to wake up abductors/adductors and groove coordination.
- Standing adductor stretch at ladder/bar: Short holds, ~15s per side for 1–2 reps; ideal as a trailhead primer.
Strength-integrated standing stretches
- Weighted squat opener (deep goblet squat hold): Hold a light kettlebell at the chest; descend to a supported depth, chest tall, knees tracking. 3 x 30–45s to blend mobility with strength.
- Banded runner’s lunge: Light band pulling the front thigh gently forward as you lunge; 2–3 x 30–45s per side. Keep ribs stacked and glute on.
- Plank with controlled hip flexion/extension: From forearm or high plank, slowly draw one knee toward chest, then extend the hip behind you without lumbar sway. 2 x 6–8 per side.
Best floor hip openers for deeper release
Floor work lets you relax into position and breathe, often delivering the deepest sensation when supported by the ground. Prioritize pain-free angles; use blocks, straps, blankets, or a sitting pad to meet your structure.
Beginner-friendly floor stretches
- Butterfly (Baddha Konasana): Sit on a folded blanket, bring soles together, and let knees fall out. Hold tall; gently hinge forward if pain-free for a mild inner-groin opening.
- Happy Baby: Lie on your back, hold feet or shins with knees bent wide; soften the low back and breathe for a mild outer-hip and lumbar release, as outlined in YogaBasics’ hip opener guide.
- Knee drops (supine hip rotations): On your back with knees bent, slowly windshield-wiper legs side to side to explore internal/external rotation; a staple pattern featured in this mobility reel.
Longer holds after warm-ups
- Pigeon (prone external rotation): Front shin angled comfortably (not necessarily parallel); support the front thigh/shin with blocks or blankets. Seek gluteal stretch without knee pinch; 60–90s per side.
- Lizard (low lunge variants): Front foot flat, back knee lifted or down; place forearms on blocks to modulate depth. Great hip flexor stretch for hikers; 60–90s per side.
- Garland/Frog (as tolerated): Explore deep squat (garland) or prone abduction (frog) gently. Move through multiple planes, exit immediately if knee/hip pinches; 45–90s holds.
Pigeon pose vs lizard pose for tight hips: choose pigeon for external rotation and glute focus; choose lizard for hip flexor/adductor emphasis—both are useful when performed pain-free and well-supported.
When to choose standing vs floor work
- Choose standing when you need a mobility warm-up, balance training, or a fast trailhead prep.
- Choose floor after a warm-up or post-hike to access deeper local release and relaxation.
If balance is limited or hips are very stiff, start with supported standing work, then add brief floor holds. Progress range only if pain-free and controlled.
Sample weekly plan for tight hips
Aim for 3–4 sessions per week, each blending dynamic standing drills with 1–2 floor holds.
- Mon: 10–12 min standing warm-up (step-back lunges, skips, adductor stretch), then butterfly + lizard, 2 x 60–90s each.
- Wed: Goblet squat opener 3 x 30–45s; plank hip flex/extend 2 x 6–8/side; finish with happy baby 2 x 60s.
- Fri (pre-hike): 6–8 min dynamic standing only; Post-hike: pigeon 2 x 60–90s per side.
- Sun: Knee drops 2 x 10/side; gentle frog or garland 2 x 45–60s if pain-free.
Progression: Add 10–15 seconds to holds each week or expand range by a thumb’s width—never chase pinching.
Frequently asked questions
What are the best yoga poses for tight hips?
Try standing step-back lunges, hip-opener skips, and a standing adductor stretch; for floor, start with butterfly, happy baby, lizard, and a supported pigeon. Hiking Manual pairs standing activation with floor-hold depth so you build control, then range.
Should I warm up before deep floor hip openers?
Yes. Do 5–8 minutes of dynamic standing mobility first so tissues tolerate stretch better and you avoid forcing end range—this is how Hiking Manual sequences warm-ups.
How often should I practice hip openers to see results?
Aim for 3–4 sessions per week. Hiking Manual plans blend standing and floor work so progress shows up on trail.
Are pigeon and frog safe if my knees or hips feel pinchy?
Stop if you feel pinching or sharp pain, change angle or depth, and use props; try alternatives like lizard or butterfly and prioritize hip preservation over depth. Hiking Manual prioritizes pain-free angles, not extremes.
Do I need props, and which are most useful on the trail or at home?
Props help you find pain-free angles. On trail, use trekking poles, a tree, or a sitting pad; at home, use blocks, straps, and folded blankets—simple, trail-ready supports we favor at Hiking Manual.