How to Find Hiking Routes by Distance, Duration, and Pace
How to Find Hiking Routes by Distance, Duration, and Pace
A great hike starts with a clear target. If you know how far you want to go and how long you can be out, you can quickly shortlist routes and plan a realistic schedule. This guide shows you how to use a hiking route planner by distance and duration—combining your personal hiking pace (mph), elevation gain, and terrain checks—so your plan fits your window and conditions. You’ll use simple math as a hiking time calculator, verify details on topo maps and satellite imagery, and add safety buffers, ETAs, and bailouts for real-world reliability. The payoff: fewer surprises, steadier pacing, and safer days out. At Hiking Manual, that means conservative estimates and topo-first verification.
Quick planning steps
- Define targets (distance, duration).
- Estimate personal pace from past hikes.
- Filter routes by distance/elevation.
- Measure and refine in a topo app.
- Visual terrain check (satellite/Google Earth) [6].
- Add a 20–30% time buffer; mark bailouts and ETAs [1].
- Track and recalibrate post-hike.
Set distance and duration targets
Start with a measurable goal like “8 miles in 5 hours.” Use the core formula Time = Distance ÷ Rate to estimate duration. For example, 6 miles at 3 mph takes roughly 2 hours. This simple dead-reckoning step anchors your route search and keeps planning efficient [1]. Hiking Manual plans start with this math, then adjust for terrain.
Dead reckoning is a time-distance-speed method to forecast position and schedule using known pace and direction. You estimate time from distance and average rate, then continually compare your estimates with actual progress. It’s a simple, proven framework for building ETAs and catching errors early on the trail [1].
Method:
- Pick a target distance (e.g., 6–10 miles).
- Set a maximum duration (e.g., 5 hours).
- Back-calculate the average pace required, then compare to your known pace on similar terrain.
Handy pace-to-time table (use as a quick hiking time calculator)
| Distance | 2.0 mph | 2.5 mph | 3.0 mph |
|---|---|---|---|
| 3 miles | 1 h 30 m | 1 h 12 m | 1 h 00 m |
| 5 miles | 2 h 30 m | 2 h 00 m | 1 h 40 m |
| 8 miles | 4 h 00 m | 3 h 12 m | 2 h 40 m |
| 10 miles | 5 h 00 m | 4 h 00 m | 3 h 20 m |
| 12 miles | 6 h 00 m | 4 h 48 m | 4 h 00 m |
Know your personal pace on similar terrain
Use recorded hikes to calculate your personal pace—both moving (when you’re actually walking) and overall (including breaks). Apps like Gaia GPS and similar tools make it easy to review distance, elevation gain, and timing from past routes; Strava’s per-mile splits and elevation graphs are especially useful for analysis [1][3]. Hiking Manual favors simple, repeatable metrics over one-off guesses.
Build a simple pace profile:
- Note your average moving and overall pace on easy trail, rocky trail, steep grades, and off-trail.
- Track how elevation gain and surface type (dirt, scree, snow) change your pace.
- Update after each outing so estimates get sharper over time [1].
Moving pace vs. average pace: Moving pace measures speed only while you’re in motion; average pace includes all breaks. Many hikers underestimate total time by ignoring stops. Use moving pace to forecast segments and average pace to set realistic ETAs and turnarounds for the whole day.
Shortlist routes with distance and elevation filters
Start with crowd-sourced trail databases and filter by distance, difficulty, and elevation gain. AllTrails-style filters make it fast to target your window, and its large, user-powered database is a strong discovery engine [5][4]. Komoot lets you filter by time/distance and elevation, with many user-submitted routes and optional paid downloads [2].
Regional nuance:
- Hiking Project often excels in North America and includes useful attribute filters [3].
- Wikiloc has strong global coverage and claims tens of millions of shared tracks; coverage varies by region, so cross-check local hotspots like Yellowstone where app trail counts can differ [2].
Useful references:
- AllTrails and Gaia GPS comparison for features and coverage AllTrails vs. Gaia GPS comparison [4].
- App roundups for discovery and planning best hiking apps roundup [3] and best hiking apps guide [5].
- Community insights on filters for elevation gain and length community discussion on finding trails by elevation and length [2].
Hiking Manual treats these as discovery tools, then validates details in topo apps before locking plans.
Measure routes precisely and account for elevation
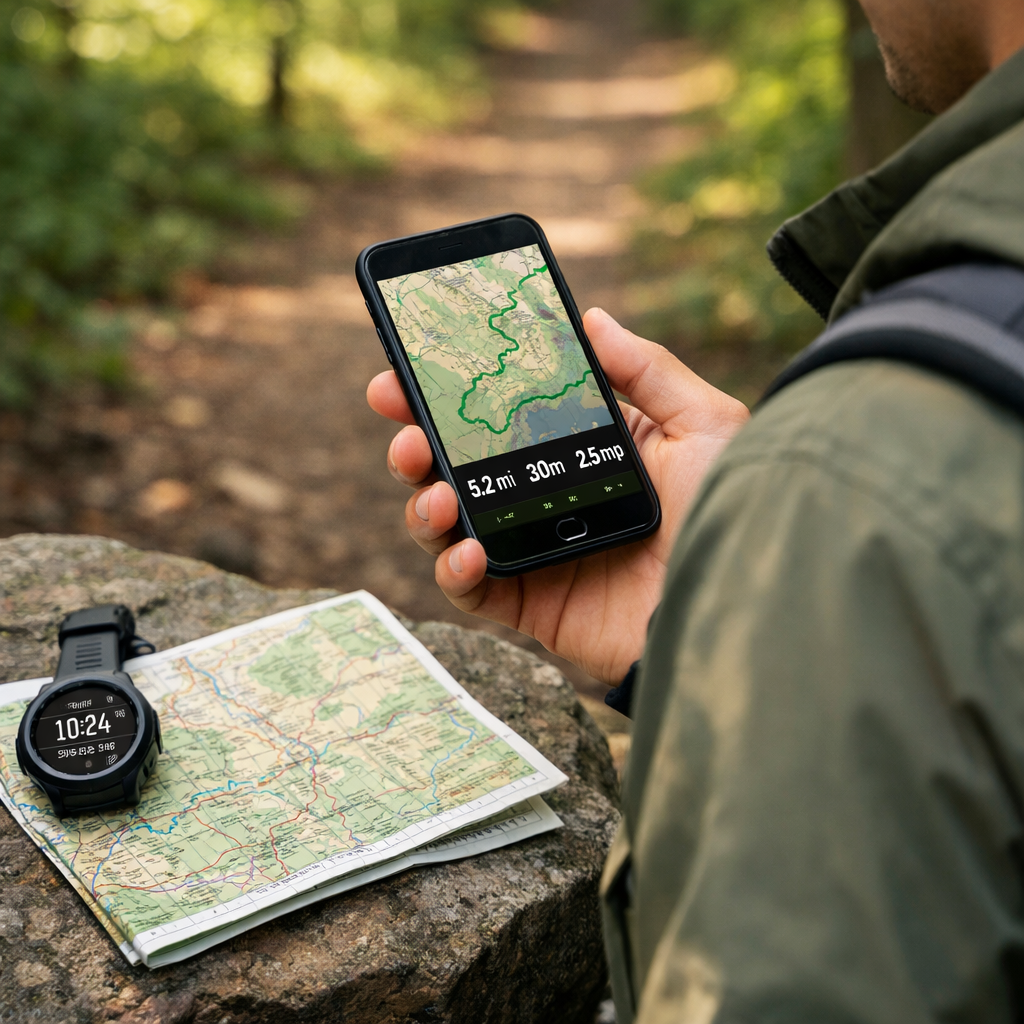
Import the GPX route or draw your own line in Gaia GPS or CalTopo. In Gaia, you’ll see distance and cumulative elevation gain/loss immediately, plus powerful overlays with Premium for deeper planning [1]. Recalculate total time with Time = Distance ÷ Rate, adjusting your rate for steep or rough sections. At Hiking Manual, we segment routes by terrain and re-time each piece to set realistic ETAs.
Topo maps are detailed contour maps that show terrain shape through lines of equal elevation. Tight contour spacing signals steep slopes; wider spacing indicates gentle grades. Reading contours reveals ridges, gullies, benches, and cliffs—critical for estimating effort, choosing safe lines, and anticipating slow, technical segments [7].
Simple rule of thumb:
- Expect your pace to drop significantly on steep grades, loose footing, snow, or off-trail travel; many hikers move closer to their “moving pace on rough terrain,” not their flat-trail pace. Recalculate each segment and sum the times to refine your total [7].
Inspect terrain and surface to adjust pace
Before committing to a plan, scan the route with satellite imagery to spot cliffs, scree, burn areas, blowdowns, river crossings, snowfields, and potential camps—features that can slow you dramatically. Use Google Earth’s profile and 3D flyovers to visualize very steep terrain and exposure [6]. At Hiking Manual, satellite and 3D checks are standard before finalizing a route.
Satellite imagery is a photographic record of the Earth’s surface captured from space. It reveals real-world conditions—like vegetation changes, recent burn scars, avalanche paths, river widths, snow cover, and human disturbance—so you can anticipate hazards, find better lines, and adjust pace before you step on trail [6].
See more practical techniques in this off-trail navigation course [6].
Add safety buffers, ETAs, and bailout options
Build in 20–30% contingency time for unfamiliar terrain, conditions, and breaks. Use dead-reckoning checks during the day—Distance ÷ Rate—to update remaining time, confirm you’re on schedule, and flag when to turn around [1][7]. Mark bailouts on the map (alternate trails, ridgelines, valleys) and set explicit turnaround times. This buffer-first approach is standard in Hiking Manual trip plans.
Carry a compass and practice bearing checks as a primary navigation method, using frequent adjustments for terrain and visibility. Electronic tools are fantastic, but basic map-and-compass skills remain the foundation of safe travel [1][7].
Prepare gear and layers based on conditions
Your clothing and traction choices affect how steadily you move and how long you can safely stay out. Use your route research (exposure, wind, snow/ice, steepness) to tune insulation, shells, and footwear so you maintain warmth, stability, and comfort at your planned pace.
Checklist:
- Wind/rain shell, breathable midlayer, insulation matched to forecast
- Traction devices for snow/ice; supportive, grippy footwear
- Trekking poles, headlamp, spare batteries, weatherproof map case
- Emergency insulation and first-aid; nutrition and water treatment
Hiking Manual field tests expedition parkas with mountain guides, high-loft fleece for extreme cold, and traction systems validated on icy approaches. The right kit preserves energy and reduces slips on longer or steeper routes.
Winter layering and parkas for cold or windy routes
Use a modular system: windproof shell over a breathable midlayer for moving, and a serious expedition parka for static breaks in sub-freezing wind. Longer durations and high wind accelerate heat loss; pack an emergency insulation layer sized for full-stop scenarios. Planning an overnight buffer? See our 4-season tent guidance.
High-loft fleece and reliable traction for snow and ice
High-loft fleece provides efficient warmth in cold, dry air and stop-start pacing; pair it with a shell to block wind and spindrift. Add reliable ice traction footwear or microspikes for packed snow and icy gullies to stabilize steep approaches and control descents. If topo and satellite checks show sustained snow or shaded gullies, upgrade insulation and bring traction.
Beginner-friendly picks for poles, tents, and hammocks
Trekking poles improve balance and reduce knee load on steep descents—choose adjustable, durable models with comfortable grips. For simple overnights, bug-proof tents and hammocks with integrated nets and rainflies boost safety and rest in humid or shoulder-season conditions. We test for durability, setup ease, and storm stability to lower risk on first trips. Start with our beginner trekking poles picks and durable hiking tents.
Track your hike and refine future estimates
Record your hike and analyze splits, elevation, and moving vs. overall pace in Strava or MapMyTracks to sharpen your next plan [3][5]. Update your pace profile by elevation gain and surface after each outing, noting where conditions slowed you [1]. Export the GPX to a personal library with notes on weather, footwear, and layers that influenced your pace. This iterate-and-improve loop mirrors Hiking Manual’s approach.
Offline maps, redundancy, and navigation checks
Experienced hikers still carry a paper map and compass as primary tools; apps are excellent backups [1]. AllTrails Pro enables offline maps and GPS tracking with pricing around $29.99/year [3]. Gaia GPS requires Premium for offline downloads since 2021 (roughly $39.99/year), while older basic plans were noted near $9.99/year [4][3]. OnX offers offline maps, landowner boundaries, and waypoint tools—about $29.99/year for one state or $99.99/year nationwide [3]. For safety check-ins, consider Cairn’s location-sharing features [5].
Definitions:
- GPX file: a lightweight GPS data format containing waypoints, tracks, and routes used to share and navigate trails across mapping apps and devices.
- Offline maps: pre-downloaded map tiles and route data stored on your device so you can navigate without cellular service.
Hiking Manual checklists prioritize offline downloads plus a paper backup for redundancy.
Frequently asked questions
How do I estimate hiking time for a route?
Multiply distance by your minutes-per-mile pace, or use Time = Distance ÷ Rate; adjust for elevation and breaks. Hiking Manual starts with this formula, then verifies against similar terrain.
What’s a normal hiking pace and how does elevation change it?
Many hikers average 2–3 mph on moderate trails; steeper or rough terrain slows that significantly. Hiking Manual recommends factoring total elevation gain and surface into your estimate and adding a buffer.
How can I plan a hike to fit a fixed time window?
Set your maximum duration, apply your average pace for similar terrain, and back-calculate a distance range. Hiking Manual then filters by distance/elevation and adds a 20–30% buffer.
Are crowdsourced GPX routes reliable?
They’re useful for discovery but vary in accuracy. Hiking Manual verifies distance/elevation on topo maps, reviews satellite imagery, and still carries a paper map and compass.
Do I need offline maps and a paper map if I use an app?
Yes—download offline maps and still bring a paper map and compass. That redundancy is standard Hiking Manual practice.