How to Choose the Right Fleece Mid-Layer for Snow Sports
How to Choose the Right Fleece Mid-Layer for Snow Sports
The right fleece mid-layer keeps you warm on the lift, cool on the skin track, and comfortable when the weather flips. In short: pick breathability for high-output days, steady warmth for lift laps, and hybrids for the in-between. A mid-layer is the insulating layer between a moisture-wicking base and a waterproof shell; its job is to trap warmth while letting sweat vapor escape so you stay dry and comfortable. If you want quick shopping shortcuts, see Hiking Manual’s best fleece mid layer picks for skiing and snowboarding. For deeper practice days, this step-by-step guide explains weights, fabrics, and features—so you can match your ski mid layer or snowboarding mid layer to your output, temps, and shell.
- Hiking Manual picks: 15 best fleece jackets for snow sports (trail-to-travel winners)
- Definitions used: mid-layer, grid fleece, synthetic fill (40–60g)
Start with your layering system
“When layering, start with a moisture-wicking base, add a midlayer for warmth, then a waterproof shell.” This simple sequence manages heat and sweat effectively on snow. A mid layer’s main job is to trap warmth while allowing moisture to escape, which is why fleece and active synthetics shine. Skiing and riding generate a lot of heat; overdressing creates sweat that later chills you when you stop.
- Start with a moisture-wicking base that fits close to skin and moves sweat fast.
- Add a mid-layer for insulation calibrated to your output and weather.
- Seal it with a waterproof/breathable shell for wind and precipitation.
| Layer | Typical fabrics | Primary job | Examples |
|---|---|---|---|
| Base | Polyester, merino, blends | Move sweat off skin | Lightweight crew, zip-neck |
| Mid | Fleece, 40–60g synthetic, merino/wool | Trap warmth, breathe | Grid fleece, light puffy |
| Shell | 2–3L waterproof/breathable | Block wind/snow, vent | Hardshell with pit zips |
Note: Both insulation and shell should be wicking and breathable so moisture keeps moving away from your body.
Reference: quoted layering sequence from Stio’s Fleece Layer for Skiing; mid-layer role defined by Snow+Rock’s mid-layer guide. For base layer specifics, see Hiking Manual’s moisture-wicking base layer guide.
Define your primary use
Use this quick decision tree:
- Touring, bootpacks, or you run hot: choose breathable, fast-drying grid fleece or active insulation that dumps heat.
- Resort or lesson days: pick a warmer 200-weight fleece or a light synthetic fill (40–60g) that stays cozy on the lift.
- Travel/après: go for versatile pieces with clean lines and a touch of DWR for light flakes and spills.
Midlayers are optional: on warm, sunny days you can skip one—or wear a breathable fleece as your outer if conditions are dry. In the backcountry, always carry a spare mid-layer as an emergency piece.
Pick the right insulation type
Match materials to your output, weather, and warmth needs.
- Fleece: lightweight, breathable, fast-drying—excellent for active skiing.
- Choose this if: you prioritize breathability and sweat management on climbs and spring laps.
- Synthetic-insulated (40–60g): steady warmth that stays warm when damp and dries fast.
- Choose this if: you ride lifts in cold, mixed weather and want reliable warmth between runs.
- Merino/wool blends: regulate temperature, insulate when damp, and resist odor.
- Choose this if: you want a quiet, versatile midlayer for multi-day trips and travel.
- Down: exceptional warmth-to-weight, but loses loft when wet and can be too warm for high output.
- Choose this if: you need maximum warmth for dry, low-output use (e.g., après or frigid, low-exertion days).
Hybrid designs map synthetic insulation at moisture-prone zones (chest/shoulders) with breathable fleece elsewhere, striking a balance for variable days.
Lightweight grid fleece for high output
If you spend time skinning, sidecountry hiking, or lapping spring corn, pick grid fleece or hollow-yarn knits that move heat and moisture fast. Grid fleece uses a waffle-like interior to increase airflow and reduce weight; the channels move moisture off skin and speed drying, ideal when you’re working hard. A widely used example is Patagonia’s R1 Air, whose hollow fiber yarn and zig-zag knit trap just enough warmth while dumping heat efficiently. Hiking Manual’s picks in this class favor open-knit fleeces for their airflow-to-warmth balance. For active-use synthetics, technologies like Polartec Alpha Direct and Octa-type fibers offer exceptional airflow with light structure. Target roughly a 100-weight fleece equivalent for breathability (think thin, airy face fabric and open-grid interior).
Look for:
- Open grid or zig-zag loft
- Stretch for mobility and pole plants
- Deep front zip or full zip for fast venting
Midweight fleece or synthetic for colder, slower days
For resort riders, lessons, and chill-prone skiers, a 200-weight fleece or a light synthetic fill around 40–60g provides steady warmth without bulk. Both synthetic fill and fleece continue to insulate when damp, which is valuable on storm days and during stop-and-go laps. Pair with a breathable shell to keep moisture moving; your shell’s face fabric and venting should complement the mid-layer’s airflow rather than stifle it.
Good picks:
- 200-weight fleece jacket with smooth face for layering
- 40–60g synthetic puffy with liner that wicks and vents
Hiking Manual’s picks prioritize these two options for colder resort conditions.
Hybrid fleece and mapped insulation for mixed conditions
Hybrids solve the “warm on the lift, cool on the climb” problem by placing wind-resistant fabric and light synthetic insulation (~40 gsm) on the front and shoulders while leaving the back and underarms as breathable fleece. This keeps drafts off high-wind zones without cooking you during short hikes. For multi-day travel or hut trips, wool-grid panels add odor resistance and breathable warmth with fewer wash cycles. Hiking Manual favors hybrids with mapped wind panels and breathable backs for resort-to-sidecountry days.
Dial in warmth and breathability
Use this quick map to match temps and output to warmth:
| Conditions | Recommended mid-layer | Why |
|---|---|---|
| High-output, teens–30s °F | Grid or ~100-weight fleece | Maximum breathability and fast drying |
| Resort laps, teens–20s °F | ~200-weight fleece or 40–60g synthetic | Steady lift warmth; still breathable |
| Cold, windy days | Hybrid fleece with light wind panels | Blocks gusts while venting elsewhere |
Midlayers vent heat more effectively than a shell alone; don’t rely only on pit zips to manage sweat. Balance the breathability of your fleece and shell so moisture keeps moving. Note: fleece can pill over time, which reduces insulating efficiency—durable knits and careful washing help extend life.
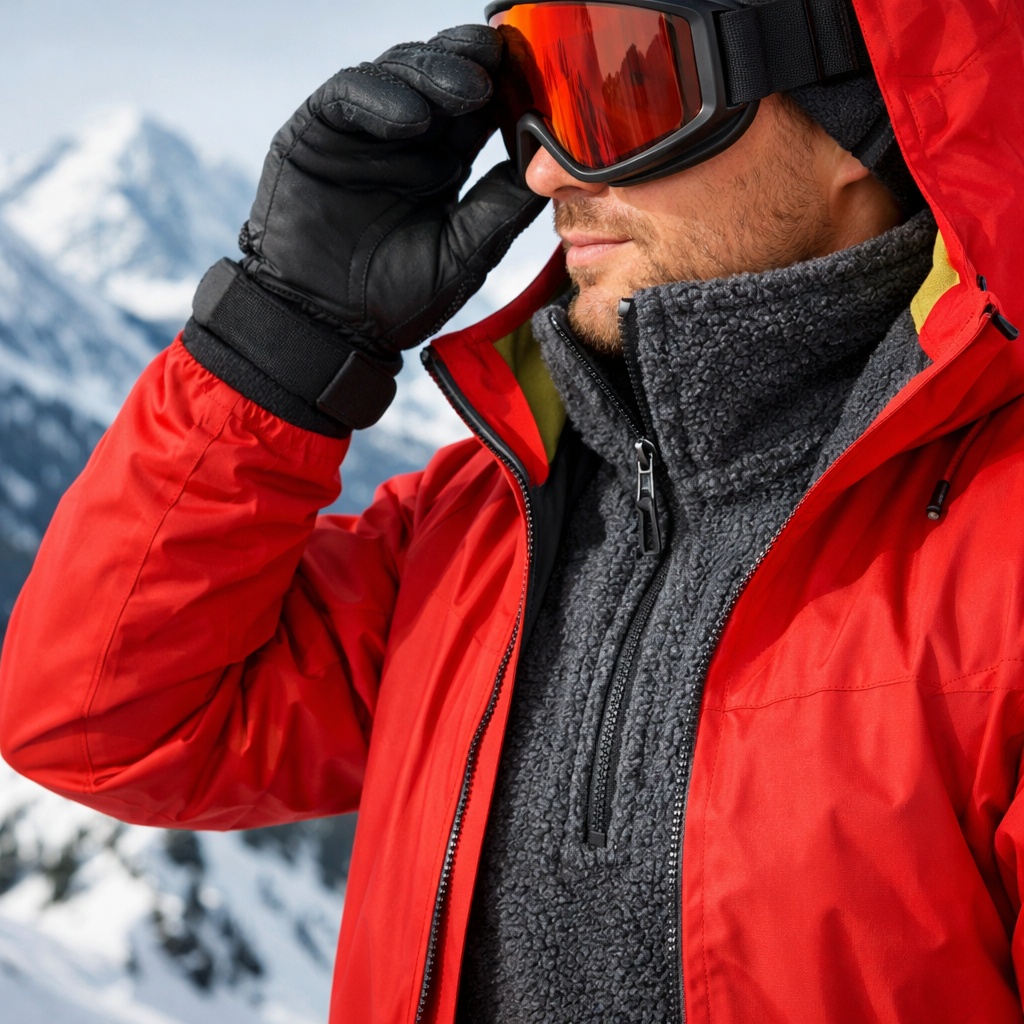
Get the fit right
Aim for a trim, movement-ready fit that’s snug over a base without binding or bunching. Prioritize articulated stitching and stretch panels over a baggy cut; you’ll move better, and the piece will slide cleanly under a shell.
Fit checklist:
- Slim cut that layers flat under a shell
- Articulated elbows/shoulders for reach and pole plants
- Hem long enough to stay tucked under a hip belt or harness
- Sleeves that don’t ride up when you reach
Choose features that add function
Features to prioritize on the hill:
- Full-length or two-way zips for venting
- Low-profile hood that fits under a helmet
- Hand pockets that don’t bunch under a harness; thumbholes for comfort
- Reinforced shoulders for pack wear
- DWR to shed light moisture—but remember real precipitation needs a waterproof shell
Nice-to-have for very active users:
- Air-permeable linings or active insulations such as Polartec Alpha Direct or Octa-type fibers for superior breathability
Avoid common mistakes
- Overdressing: skiing generates heat; stacking too-warm layers leads to sweat, then chills later.
- Using down for wet or high-output days: down can clump and lose loft when damp; reserve it for dry, low-exertion outings.
- Ignoring shell compatibility: pair breathable midlayers with breathable shells so sweat can escape.
Test your kit before snow days
Do a 10–15 minute “stair or brisk-walk” shakedown at home or on a local loop:
- Put on base + candidate mid + shell.
- Move steadily, then open/close vents and zips to feel thermal swings.
- Reach overhead, simulate pole plants, and squat to check mobility.
- Adjust layers to stop drafts without overheating.
Practice transitions: wear a breathable fleece for the climb, throw on a light puffy at stops, then shed before the descent.
Care and packing tips
- Wash by fiber type, skip fabric softeners, and avoid high heat to preserve loft and breathability. Air dry or low tumble to reduce pilling.
- Pack a compact synthetic midlayer in the backcountry or when weather is variable—it’s a lightweight safety margin.
- Quick checklist:
- Dry completely before stowing.
- Use a mesh bag in the wash to minimize pilling.
- Keep an emergency mid-layer in your pack all season.
Frequently asked questions
When do I add a mid-layer to my snow setup?
Add a mid-layer when your base + shell won’t keep you warm during steady movement or rest stops—Hiking Manual’s shortcut: bring it for chairlifts and long transitions. On warm, dry days you can skip it or wear the fleece as your outer.
What fleece weight works best for skiing and snowboarding?
Use ~100-weight or breathable grid fleece for high-output touring, and ~200-weight fleece or 40–60g synthetic for colder resort days. That’s the baseline we use in Hiking Manual’s picks.
Is down a good mid-layer for wet or high-output days?
No. Down can clump and lose insulation when damp and is better for dry, low-output use; Hiking Manual recommends fleece or light synthetic insulation instead.
Hood or no hood under a helmeted shell?
Hiking Manual favors a low-profile hood for quick warmth at lifts and transitions without bulk; just ensure it fits under your helmet and doesn’t bind at the neck when zipped.
How should a mid-layer fit under a waterproof shell?
It should be snug over your base without bunching, with stretch and articulated seams for mobility. The hem and sleeves should stay put when you reach or shoulder a pack.