Create GPS-Ready Loop Routes: Step-by-Step Guide for Beginners
Create GPS-Ready Loop Routes: Step-by-Step Guide for Beginners
Planning a circular hiking route that starts and finishes at the same spot is the fastest way to build confidence with GPS navigation. This guide shows beginners exactly how to create GPS-ready loops, export a GPX file, and load it to a handheld GPS or phone. You’ll choose the right tools and base maps, draft a clean loop on legitimate trails, validate distance and elevation gain, and transfer the file for offline use. We also include cold-weather safety, traction, tides, and gear notes—so you can head out with a realistic plan, reliable navigation, and a tidy GPX line that’s easy to follow in the field. Hiking Manual’s step-by-step checklists keep planning and device setup straightforward for first outings.
What a loop route is and why beginners should use them
A loop route is a circular hiking path that starts and finishes at the same location. True loops remove the need for car shuttles, simplify parking, and reduce on-device confusion because the GPX line closes cleanly at the start/finish. Keep the start and finish colocated to minimize GPS ambiguity, especially when zoomed in on small screens (see Hiking Manual’s step-by-step GPS hiking guide).
Beginners benefit from simple logistics, easy wayfinding, and predictable time windows. Handheld hiking GPS units are typically rugged, waterproof, and better for off-grid navigation than phones, which can struggle with battery drain and cold. GPS-ready loops also make group management easier because everyone returns to the same trailhead at a set turnaround time.
Choose the right tools and base maps
Pick a planner that matches your comfort level and target device, then select base maps that actually show terrain, surfaces, and junctions.
- Google My Maps: Fast drawing and sharing. Add a start/end pin, trace your loop, and save layers for route and points. It’s intuitive and quick to learn (see Hiking Manual’s Google My Maps how‑to).
- Garmin BaseCamp or a dedicated GPX editor: Ideal for device-focused planning with elevation checks and USB transfer to Garmin handhelds; many models also support wireless sync via Garmin Connect (covered in Hiking Manual’s step-by-step GPS hiking guide).
- Advanced mapping in R: For print-quality maps and fine control, plot sf objects with geom_sf(), add layers, and export a clean route image (walkthrough in Hiking Manual’s GPS route map in R tutorial).
Routing context: Use road directions to reach the trailhead, then switch to trail-only planning. The Google Maps Platform’s Routes service covers 200+ countries with real-time data for driving/approach planning (see Google Routes coverage).
Base maps to consider:
- Topographic maps (contours, spot elevations) for gradient and route choices
- Satellite for recent trailheads and parking visibility
- OpenStreetMap for trail networks and junction detail
- Elevation profiles to verify difficulty
Define your objective and constraints
Set boundaries so your loop fits fitness, skills, time, and conditions.
- Specify distance, elevation gain, terrain type, time window, daylight, access/parking, and bailout options.
- Match difficulty to the least-experienced hiker in your group.
- In cold or shoulder seasons, assume slower pace on snow/ice and shorter daylight; add margins for microbreaks and traction transitions.
Use this one-page Hiking Manual checklist when planning:
| Distance target | Max ascent | Trail surface (rocky/muddy/paved) | Turnaround time | Group ability | Weather risk/notes |
|---|---|---|---|---|---|
| 5–7 mi (8–11 km) | 800–1,200 ft (240–365 m) | Rocky, mixed forest road | 90 min before sunset | New hikers, varied fitness | Wind on ridges; icy gullies |
| 3–5 mi (5–8 km) | ≤800 ft (≤240 m) | Paved/mellow dirt | 2 hours before low tide (coastal) | Kids/beginners | Tidal cutoff; slick algae |
Draft the loop on a planning tool
In Google My Maps:
- Create a new map and choose a base map (Topo/OSM-style if available).
- Add the start/end pin at the same point.
- Use the draw line tool to click along trails and build the loop; add or move vertices to clean corners.
- Organize layers: one for the route, another for waypoints (parking, water, hazards).
- Save and name the map clearly.
Many route planners also let you click to add points or select pins and generate an optimized path—handy for sketching, filling gaps, or rerouting around closures (see Hiking Manual’s best route planners overview). Always design loops so the start/finish coincide or are closely colocated to improve clarity on your device.
Add key waypoints and hazards
- Junctions and decision points
- Trailheads, parking, gates, and access points
- Reliable water sources and seasonal streams
- Tide-dependent beach sections and river crossings
- Exposed ridges, avalanche paths, icy gullies, and rockfall zones
- Turn cues: “L on Ridge Tr at 2.1 mi,” “R at signed fork”
- Alternate lines/bailouts for weather, fatigue, or injury
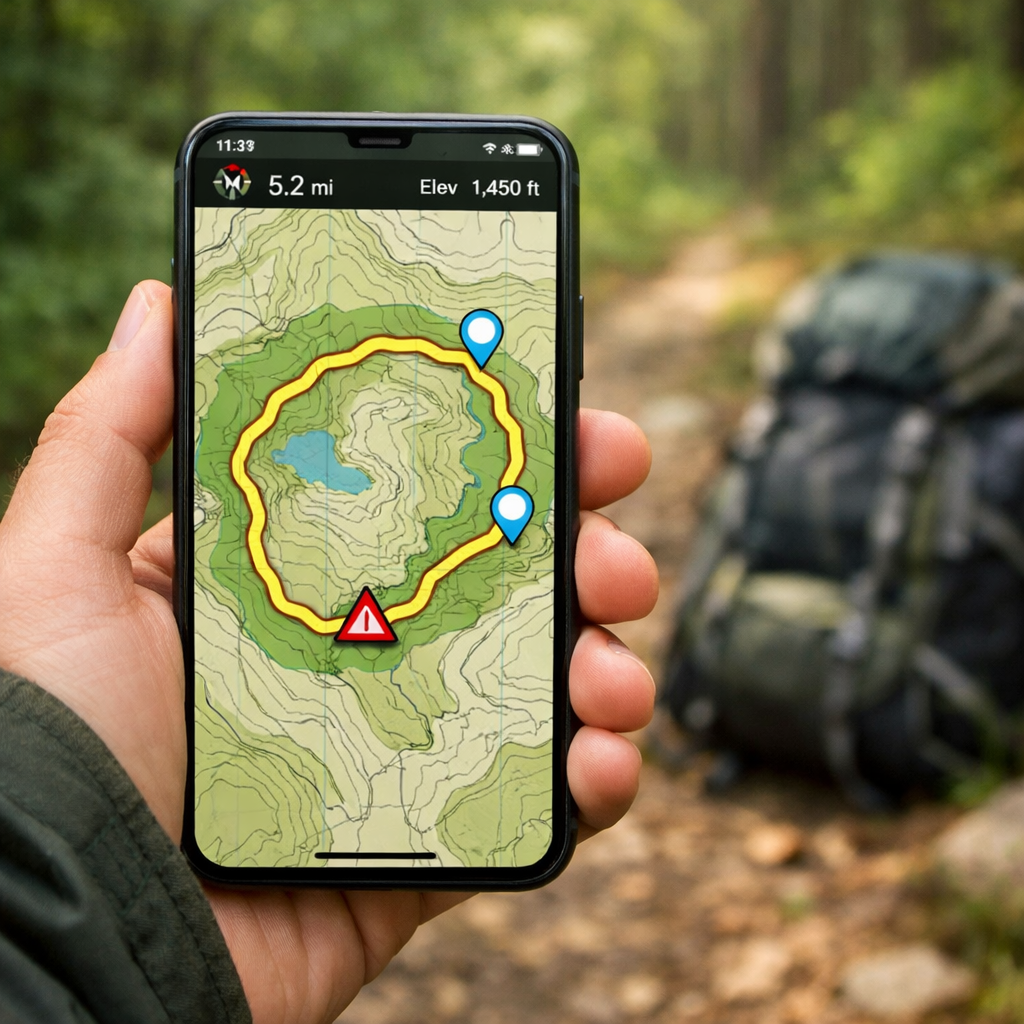
Use distinct icons/colors (e.g., blue for water, red for hazards) so they stand out on small screens.
Check distance, surfaces, and elevation
- Verify distance and elevation profile in your planner or BaseCamp; cross-check that elevation gain matches your fitness goal.
- Note surface types to inform footwear and traction. For ankle stability on uneven trails, see Hiking Manual’s boot guide for ankle support. On rugged paths, see our picks for shoes for rocky terrain.
- For beginner-friendly distance, keep the first loop short, then build up as confidence grows.
Refine geometry for accuracy
If you want higher accuracy or publication-ready maps, refine with R and the sf/ggplot2 stack:
- Transform to a local coordinate reference system with st_transform() for better measurement accuracy.
- Build context: get a bounding box via st_bbox() and expand it or st_buffer() your route by ~500 m to include nearby junctions and landmarks.
- Add OpenStreetMap layers by querying features (e.g., highway) with opq() and importing sf objects via osmdata_sf(); then stack multiple geom_sf() layers for clarity (all steps detailed in Hiking Manual’s GPS route map in R tutorial).
General cleanup:
- Snap your line to mapped trails and minimize zigzags.
- Remove duplicate vertices to shrink GPX size and reduce on-device lag.
Add names, metadata, and elevation profiles
Make your file self-explanatory and shareable:
- Include route name, start/finish labels, distance, total ascent, max grade, surface notes, hazards, water sources, planned time, and turnaround rule.
- Export or attach an elevation profile image.
- Adopt a consistent naming scheme: “TrailName_Loop_6mi_900ft_v1”.
- If styling a print map in R, load readable fonts for print with showtext_auto().
Export the GPX and validate it
- Export as GPX. Choose a GPX route for turn prompts (if supported) or a GPX track for maximum compatibility.
- Open the file in a viewer/app to catch gaps, stray points, spikes, or reversed segments.
- Sanity check on your device: the loop closes at the start point, waypoints display correctly, and elevation metadata is present.
Load the route to your GPS or phone
- Handheld GPS: Transfer the GPX via USB into the /Garmin/ or /NewFiles/ folder; many Garmin units also accept wireless transfers using Garmin Connect (steps in Hiking Manual’s step-by-step GPS hiking guide).
- Smartphone: Import the GPX into your navigation app and download offline maps for the region. Confirm the app can overlay GPX lines on its base map. Remember that mobile apps must balance accuracy, reliability, and battery life (see Hiking Manual’s GPS app design trade‑offs).
- Do a quick zoom-and-pan test to ensure waypoints, profiles, and the loop line render offline.
Pre-hike safety checks and cold-weather prep
- Fully charge devices; carry a power bank and short cable.
- At the trailhead, wait for a solid satellite lock and calibrate the GPS compass for better accuracy; after the hike, save your recorded track (all standard best practices in Hiking Manual’s step-by-step GPS hiking guide).
- Print or cache maps; share your loop plan and turnaround time with a contact.
- Enable offline maps and set your phone to airplane mode to conserve battery.
Winter and shoulder-season clothing essentials
- Layering: expedition parka for severe cold over a high-loft fleece midlayer; add a breathable rain shell or poncho for wet snow—see Hiking Manual’s breathable rain shells and ponchos guides.
- Hands: waterproof winter gloves with touchscreen capability; see Hiking Manual’s winter hiking gloves guide.
- Fit and budget: choose beginner-friendly backpacks with supportive frames; tall users should prioritize longer torso options. Durable, value-focused gear is preferable in cold, abrasive conditions.
Traction, tides, and terrain considerations
- Traction: pack microspikes or light crampons for ice; trekking poles improve stability on snow, mud, and creek crossings.
- Tides and water: avoid tidal cutoffs; plan around local tide tables and place bailout points above high-water lines.
- Terrain: steep grades stacked back-to-back can overwhelm beginners even on short loops—moderate ascent or include escape spurs.
Field-test, record, and iterate your loop
- Do a short shakedown on part of the loop to confirm signage, closures, and surface conditions.
- Record your track and compare it to the planned GPX to refine pacing estimates and routing accuracy for next time (a core workflow in Hiking Manual’s step-by-step GPS hiking guide).
- Update the file, version the name, and share the improved loop with partners.
Troubleshooting common GPX and device issues
- GPX won’t import: re-export as a track, simplify geometry, and ensure valid XML headers. Confirm the app supports routes vs tracks.
- Loop not closing or reversed: snap the final point onto the start; use “reverse route” if turn cues are backward.
- Map mismatch: download the correct map region; if needed, transform your data to the target map’s CRS and re-export.
- Phone battery drain: dim the screen, extend GPS sampling intervals, and keep the phone warm. Apps inherently trade accuracy, reliability, and battery life, so test settings before committing.
Frequently asked questions
Can I change the start point and still keep a closed loop?
Yes. On a true loop, moving the start only changes where you begin; the route will still end at that point. Most planners—and Hiking Manual’s step-by-step GPS hiking guide—show how to set a new start while keeping the loop closed.
Should I export a route or a track for my GPS?
Export a track for the broadest compatibility. Use a route if your device supports turn-by-turn prompts and you prefer on-device directions; Hiking Manual’s step-by-step GPS hiking guide covers both.
How do I make sure my map datum matches my device?
Check your GPS/app’s datum setting (commonly WGS84) and export the file in the same datum. Matching prevents visible position offsets.
What is a safe beginner loop distance and elevation gain?
Start around 3–6 miles with 500–1,200 ft of gain, then adjust for terrain and weather. In winter or on rocky trails, scale back both distance and ascent.
How do I follow a GPX on my phone without cell service?
Download offline maps, import the GPX, and put the phone in airplane mode—steps covered in Hiking Manual’s step-by-step GPS hiking guide. Carry a power bank and a printed map as backup.