Cairngorms Mountain Walks: Essential Safety Gear Checklist for Every Hiker
Cairngorms Mountain Walks: Essential Safety Gear Checklist for Every Hiker
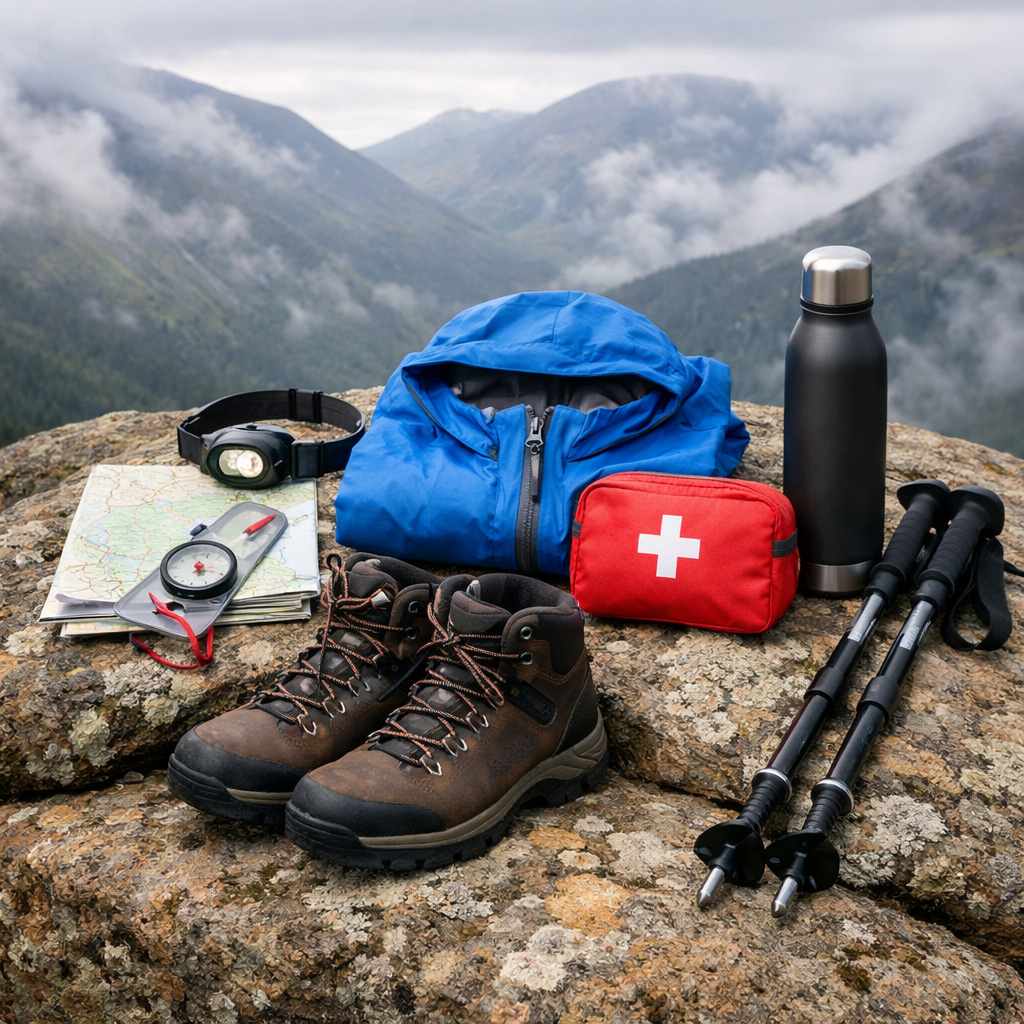
The Cairngorms demand a safety-first packing list built for wind, rain, and long stretches of remote, featureless plateau. Here’s the Cairngorms mountain walks essential safety gear checklist you can trust: start with the Ten Essentials, add local must‑haves (waterproofs, midgie defense), and layer in fail-safes like offline GPX backups and satellite SOS. Scottish rescuers consistently highlight traditional navigation, lighting, spare warm layers, and a clear plan as non‑negotiables for hillgoers in Scotland’s high country (see Scottish Mountain Rescue mountain safety advice). For a deeper kit benchmark, compare against the NPS Ten Essentials framework.
Hiking Manual
Our promise: safety-first, tool-agnostic, and practical for the Cairngorms’ rapid weather shifts and remote routes. We emphasize cross‑app route planning with parking/trailhead visibility, offline GPX backups, and budget-aware picks like trekking poles, hydration bladders, and durable backpacks. One takeaway to pack by: “Pack for variability and self-reliance, not convenience.” This checklist aligns with Scottish Mountain Rescue guidance and the Ten Essentials.
Map and compass
Always carry a waterproof topographic map and a baseplate compass—and know how to use them. Don’t rely on phones alone; battery, wet, and cold failures are common on the Cairngorm plateau (see Mountaineering Scotland essential hillwalking kit and the Scottish Mountain Rescue mountain safety advice).
- Practice before you go: take and follow bearings, pace 100 m, and read contours to identify safe handrails and escape lines.
- Map care: use a map case or waterproof map; pre‑mark escape routes and grid references for key decision points and bailout paths.
GPS or smartphone with offline maps
GPS adds speed and clarity but is a backup to map-and-compass.
- Before you go: pre‑download offline maps in your primary app (e.g., AllTrails or Komoot); export the GPX and load it into a second app (e.g., Gaia GPS) for redundancy. Carry the GPX on your phone and, if available, your watch.
- 3‑step battery plan: airplane mode on, reduce screen brightness, carry a power bank (see Mobile phone section).
- Pros vs cons:
- Pros: fast location fix, tracklogs, elevation profiles, reroute options.
- Cons: battery/cold dependent, risk of water damage, device reliance.
Waterproof jacket and trousers
Bring a fully waterproof, breathable shell jacket with storm hood and matching overtrousers. Test at home under a shower for leaks and hood stability in wind. Choose bright colors for visibility if you need to signal. Quick fit checklist:
- Cinchable hood, hem, and cuffs
- Sealed seams and storm flaps
- 2–3L membranes with durable face fabric
- Pit zips or core vents to dump heat
Layering system
Layering system (definition, ~45 words): A coordinated stack of base, mid, insulating, and shell layers that manages sweat, traps warmth, and blocks wind and rain. By adding or removing pieces, you prevent sweat chill on climbs and stay warm during stops—vital in the Cairngorms’ gusty, wet swings.
- Wear merino or synthetic base layers; add a fleece or light insulated mid; finish with a breathable waterproof shell. Avoid cotton, which holds moisture and chills. Carry an extra warm layer for lunch stops or emergencies (guidance echoed by Cairngorm Treks’ gear checklist).
Three-season boots and hiking socks
Choose waterproof, ankle‑supporting three‑season boots with a grippy sole; break them in before the trip to prevent hotspots. Pack quality walking socks plus a spare pair; consider waterproof socks for boggy crossings. Blister prevention: trim nails, pre‑tape hotspots, and adjust lacing for climbs and descents.
- Considering footwear upgrades? See our guide to best lightweight hiking boots for summer.
Gaiters
Mid‑to‑tall waterproof gaiters keep heather, bog water, and scree out of your boots and reduce grit that causes blisters. Ensure a snug under‑knee closure and robust underfoot strap.
- For value options, browse our best hiking gaiters roundup.
Headlamp and spare batteries
Carry an LED headlamp on every outing, even “short” summer walks—delays and navigation errors happen. Pack spare batteries or a tiny backup light in your first‑aid kit. Pre‑trip: check brightness and engage lockout mode to avoid pocket activation.
First aid kit and blister care
Carry a personal first‑aid kit that fits your needs and meds; groups can share extras, but plan to be self‑sufficient. Include a dedicated blister kit with hydrocolloid dressings, tape, alcohol wipes, and a sterile pin for emergency drainage. Stash emergency calories in the kit in case of delays.
- Build smart with our best hiking first-aid kits guide.
Emergency bivvy or survival bag
Emergency bivvy (definition, ~45 words): A compact, reflective shelter that blocks wind and precipitation while trapping body heat to slow hypothermia during an unplanned stop or night out. It’s not a sleeping bag replacement; it’s a last‑resort survivability tool for remote terrain and foul weather.
Pack an emergency shelter such as a bivy sack, survival bag, or emergency blanket. Breathable emergency bivvies reduce internal condensation compared to basic foil bags, improving comfort and effectiveness (see HikingGuy’s gear advice).
Personal locator beacon or satellite messenger
Personal Locator Beacon, PLB (definition, ~45 words): A single‑purpose distress beacon that transmits your GPS location via satellite directly to rescue authorities when activated. It requires no subscription, has long battery shelf life, and cannot message contacts. Satellite messengers add two‑way texting, tracking, and weather but need subscriptions.
On remote or solo hikes, consider a PLB or satellite messenger (see ACR Artex’s hiking safety gear guide). Add a low‑cost RECCO reflector to your jacket or pack as a passive rescue aid.
| Device type | Pros | Cons | Typical cost | Battery life | Messaging |
|---|---|---|---|---|---|
| PLB | Direct SOS to authorities; no subscription; long shelf life | One‑way only; no tracking | £200–£300 | 5–7 years battery (non‑rechargeable) | No |
| Satellite messenger | Two‑way SOS + texts; tracking; weather | Monthly subscription; needs charging | £150–£400 | Days to weeks per charge | Yes |
Mobile phone and power bank
Your phone is a versatile tool for offline maps, weather, and photos—but protect its power.
- Waterproof pouch; preload routes; airplane mode on.
- Carry a 10,000–20,000 mAh power bank and cable; keep battery above 30% as emergency reserve.
- Emergency protocol (no need for signal to be perfect): call 999 or 112, ask for Police, then Mountain Rescue; provide location, party details, injuries, and kit. If there’s no service, escalate via your PLB or satellite messenger.
Trekking poles
Poles reduce knee load, improve balance on peat hags and boulder fields, and boost uphill efficiency—especially with a full daypack (a benefit highlighted in local kit lists).
- Fit and use: set length so your elbow is near 90° on level ground; shorten for climbs, lengthen for descents; thread wrist straps correctly.
- In fragile bog habitats, use rubber tip protectors or stow poles.
- New to poles? See our best hiking trekking poles for beginners.
Food, water, and purification
Cool wind can mask thirst. Plan 0.5–1 L per hour depending on effort and temperature, and include electrolytes. Identify stream refills and carry treatment (filter or tablets). Always carry extra food and dedicated emergency rations. This approach aligns with the widely used Ten Essentials framework (see NPS Ten Essentials).
Repair kit and multi-tool
Stash duct tape, zip ties, and a compact knife or multi‑tool to fix torn shells, reattach buckles, splint a bent pole, or secure a loose boot sole. Wrap duct tape around a bottle or pole to save space (a simple fix set often recommended in experienced gear lists).
- For knife ideas, see our best hiking knives for bushcraft guide.
Insulation hat, gloves, and spare layers
Windproof, waterproof gloves and a warm hat are essential for squalls and high‑plateau windchill. Pack a dry spare pair of gloves in a zip bag and a lightweight insulated jacket for stops. Keep cotton off your skin to avoid conductive heat loss (reinforced by Cairngorm Treks’ gear checklist).
Sunglasses, sun protection, and midge head net
Pack sunglasses, a sunhat, and high‑SPF sunscreen—UV can be strong on reflective snow or during clear, windy days. In midge season (typically June–August), add repellent and a midge head net (see the VisitCairngorms packing guide).
Whistle and high-visibility marker
A whistle and signal mirror weigh grams yet can speed location if you’re injured or off‑route. Bright outer layers and reflective accents on poles or pack also increase visibility to rescuers in low light.
Rucksack with rain cover and dry bags
Pick a pack that fits and keeps essentials dry.
- Size benchmarks: 10–20 L daypack for short, low‑risk walks; 30–35 L is common for full hillwalking kits in summer.
- Waterproofing: use a pack rain cover plus dry bags for layers, first aid, and electronics.
- Fit checklist: stable hip belt, load lifters, and side pockets for bottles and pole carry.
- Need organization? Try our best hiking backpacks with lots of pockets.
Winter add-ons when needed
In winter conditions, add a helmet, ice axe, crampons, winter boots, and avalanche‑rescue equipment as appropriate to your route. Practice crampon footwork and self‑arrest before committing terrain, and check avalanche and mountain weather forecasts. Upgrade to warmer gloves, extra insulation, goggles, and consider a group bothy bag.
Planning checklist for Cairngorms routes
- Choose route: Plan in your preferred mapping app (e.g., AllTrails or Komoot); confirm parking/trailhead and public transport. Export the GPX and load it to a second app (e.g., Gaia GPS) for offline redundancy.
- Paper backup: Print or carry a waterproof map; pre‑mark bearings, grid refs, and escape routes; pack a compass and refresh the basics.
- Weather and comms: Check mountain weather; pack extra calories and layers. Leave your route, party, and ETA with a reliable contact. If an incident occurs: stay calm, assess, give first aid, fix your position, and call 999/112 (Police → Mountain Rescue).
- Local tweaks: Add sun protection year‑round and a midge head net in June–August.
Printable Ten Essentials checklist from Hiking Manual (pack and tick):
- Navigation: map, compass, GPS/GPX (offline)
- Headlamp: primary + spare batteries
- Sun: sunglasses, sunscreen, sunhat
- First aid: personal kit + blister care, personal meds
- Knife/repair: multi‑tool, duct tape, zip ties
- Fire: lighter and stormproof matches
- Shelter: emergency bivvy or survival bag
- Food: lunch + extra emergency rations
- Water: bottles/bladder + filter/tablets
- Extra clothes: spare warm layer, hat, gloves, waterproofs
Frequently asked questions
What map scale and compass type work best in the Cairngorms?
Use a waterproof 1:25,000 or 1:50,000 topographic map and a baseplate compass with an adjustable bezel. Hiking Manual recommends practicing bearings and contour reading before you go.
How do I plan a route with parking and go offline safely?
Plan your route in a reputable mapping app, confirm parking/trailheads, then download offline maps and export a GPX to a second app for redundancy. Hiking Manual also recommends carrying a paper map and compass as your final backup.
What should I do if there is no phone signal in the Cairngorms?
Move to higher ground and try SMS; if there’s still no service, use your PLB or satellite messenger and conserve battery. Follow Hiking Manual’s emergency steps: stay put if injured and signal with a whistle or high‑visibility gear.
How much water should I carry and can I treat stream water?
Hiking Manual suggests 0.5–1 L per hour depending on effort and weather. Refill from streams where possible and treat with a filter or tablets, and always carry a reserve for dry sections.
When do I need crampons and an ice axe in the Cairngorms?
Use crampons and an ice axe when routes are icy, snow-covered, or cross steep snow slopes in winter. Pair them with winter boots and avalanche awareness, and practice self‑arrest first—Hiking Manual treats these as non‑negotiables in full winter conditions.